A practical guide to publishing your first projects
Before we start
Once a project works locally, sooner or later a very simple question comes up: how do I actually put this online?
This guide starts there. The idea is to make the step from local project to published version clearer, without complicating it unnecessarily and without making it sound more mysterious than it is.
It is not meant to cover every possible case. It is a practical foundation for understanding what deployment means, which steps really matter at the beginning and which mistakes are worth avoiding on your first attempts.

1. What deployment actually is
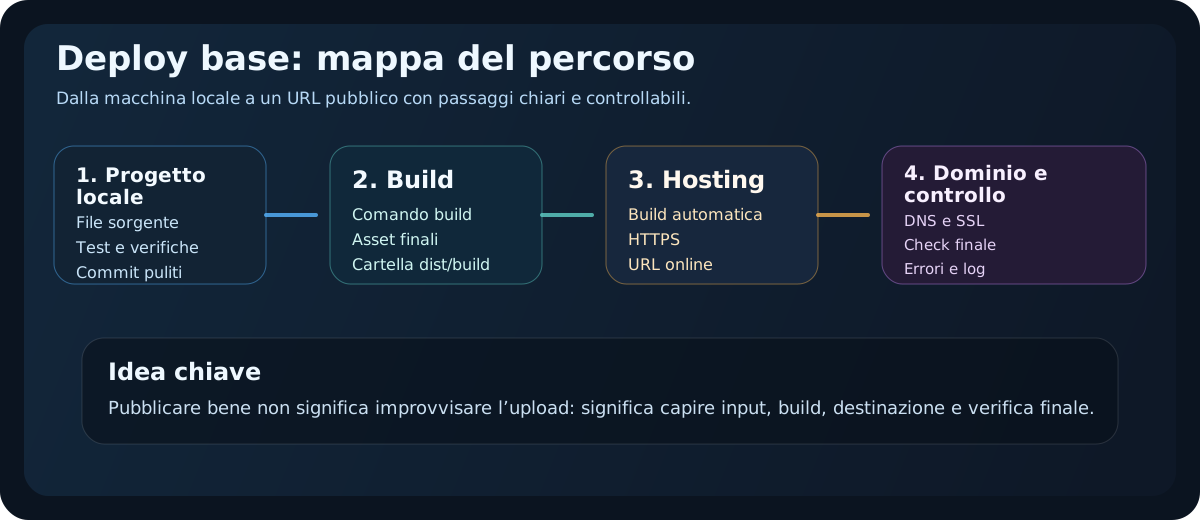
Deploying means taking a project from your computer to somewhere it can be reached online.
Put more practically: you stop having a site or an app that only runs locally and start having a URL you can open in a browser and share with other people.
In between, though, there is almost always one important technical step:
- locally you work on source files;
- online you usually publish a build that is ready to be served;
- the hosting takes those files and exposes them on the web.
Understanding this saves you from one of the most common misconceptions: thinking that deploying just means “uploading a folder”. Sometimes it is, but often you have to generate the right output first.
2. What you need before publishing
Before deploying, it is worth running a very simple but serious check. The project should already be stable locally.
- the build should complete without errors;
- the main pages should open correctly;
- assets, images and fonts should have consistent paths;
- there should be no secrets inside the repository;
- the Git history should be clean and readable.
If something is fragile locally, going online tends to make it worse, not better.
If you are still sorting out your day-to-day project workflow, the VS Code essentials guide helps a lot with keeping the terminal, tasks and debugging tidy, while GitHub in practice is useful for the repository and code-publishing side.
3. Build, output and the final folder
Here it is worth drawing an important distinction: not every deployment works the same way.
In the simplest case you may already have finished files — plain HTML, CSS and JavaScript — and upload them by hand to the server or through the hosting panel. In scenarios like that there may even be a separate folder holding files that were minified or prepared manually, with no real automated pipeline.
On many modern projects, though, you do not publish the source files directly. You publish the result of the build.
In projects that use tools like Vite, Webpack, Parcel or other bundlers, publishing is not just a last-minute compression step. The project is set up from the start to go through a build.
That means the project already has a certain shape to begin with: source files, dependencies, scripts, configuration, working folders and a command that knows how to turn all of it into a final version ready to deploy.
In practice the working tree often contains material that should not go online as it is:
- source files meant to be transformed;
- dependencies and development tooling;
- bundler configuration;
- assets that will be optimised or rewritten during the build.
The build is the process that prepares the project for distribution: it optimises assets, minifies the code, resolves dependencies and generates the final files inside an output folder such as dist, build or similar.
This approach costs a little more up front, because the project is more structured, but the benefits are very concrete: automation, fewer manual steps, more consistent output, fewer repeated mistakes and a deployment that is easier to redo the same way every time.
So before talking about commands or hosting, it is worth working out what kind of project you have in front of you and which route makes most sense for publishing it. For example:
- a very simple site, where the files to put online are already finished and you can upload them directly;
- a setup where you prepare a separate final version first — a folder with minified or hand-tidied files — and publish that;
- a modern codebase built around a bundler like Vite, which generates the final files from the sources automatically.
If we take a scenario that is very common in modern front-end work, the picture looks like this: a Git repository, a local bundler such as Vite, and hosting connected to the repository, so that deployment becomes an almost natural consequence of a push.
It is not the only possible model, but for static sites and many front-end applications it has become a de facto standard, because it brings automation, optimisation and repeatability together.
In this kind of setup, the point is not to memorise a long list of commands. The point is knowing which step actually produces the final version of the project, and which folder holds the files that need to go online.
Usually that final version is produced by the build and ends up in a folder like dist, build or similar, depending on how the project is configured.
This distinction matters because, when you connect a repository to automated hosting, the platform needs to know exactly three things:
- which repository or folder it should read;
- which command it should run to build;
- which final folder it should publish.
When those are set correctly, the benefit is tangible: you push, the platform rebuilds the project and publishes the right output, with no need to repeat the same work by hand each time.
If instead you are uploading files manually, the principle does not change: you still have to know which files are the sources and which are the final ones to publish. If that distinction stays fuzzy, the deployment breaks or gets misconfigured very easily.
4. Static hosting: the best place to start
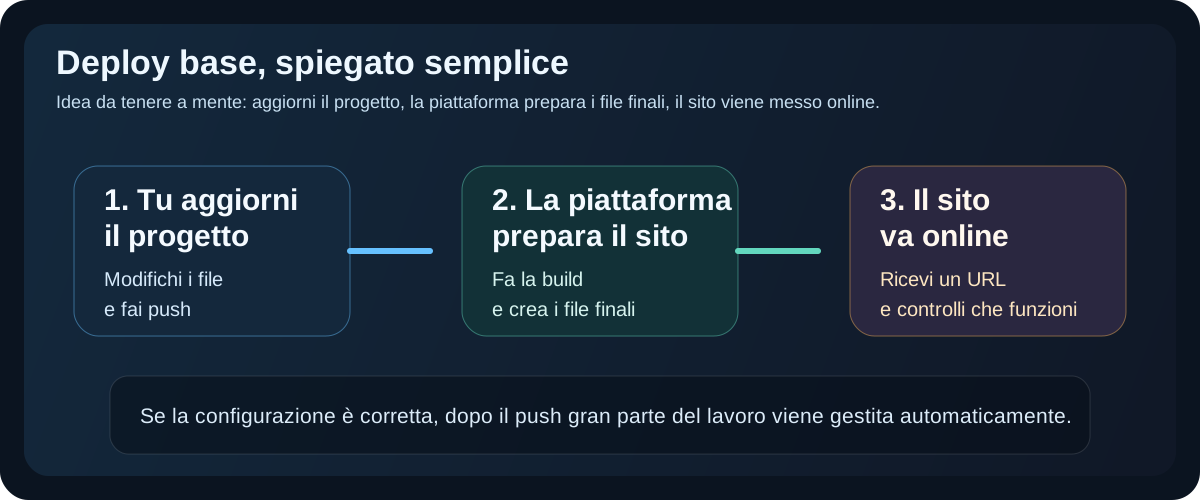
What matters here is not so much the label, but the practical mechanism.
In this case you end up with a set of finished files — the site's pages, the CSS, the scripts, the images and the fonts.
At that point the platform takes those files and publishes them online as they are, without asking you to manage a machine, a complex server or heavier configuration on your own.
For someone starting out, this is often the simplest and most sensible route. It works perfectly well for HTML/CSS/JS sites, landing pages, portfolios, documentation and many compiled front-end projects.
The early benefits are concrete:
- simpler configuration;
- costs that are often zero or very low;
- HTTPS and a CDN already included on many platforms;
- convenient GitHub integration.
Tools like Vercel, Netlify, Cloudflare and GitHub Pages are very useful here because they remove a lot of friction: you connect the repository, push your code, and the service runs the build and publishes the result.
To get started, this approach is almost always clearer than jumping straight into complex servers, VPSs, containers or heavily manual configuration.
5. A basic workflow with GitHub + hosting
The flow that is most useful to internalise early on is this:
- you work locally;
- you check that the project works;
- you commit and push to GitHub;
- the provider detects the change;
- a new build starts;
- if all goes well, the updated site goes live.
This model is valuable because it separates responsibilities cleanly:
- you look after the code and the configuration;
- GitHub stores and versions the project;
- the hosting handles publishing and distribution.
It is also why Git and GitHub become so useful before deployment: if the history is tidy, working out what broke a build gets far simpler too.
A minimal example worth remembering
When you connect a repository to a provider, you will generally be asked for only a few details:
- the GitHub repository to use;
- the branch to publish, often
main; - the build command, for example
npm run build; - the final public directory, for example
dist.
From then on, every push to the chosen branch triggers a new automatic deployment.
6. Domain, DNS and HTTPS
At first you can live perfectly well with the URL the provider generates, but sooner or later you will want to connect a domain of your own.
This is where DNS comes in: the settings that tell a domain where it should point.
You do not need to become an expert straight away, but three ideas are worth fixing in your mind:
- you buy the domain from a registrar;
- the hosting tells you which DNS records to configure;
- HTTPS is usually issued automatically once the connection is correct.
One of the first sources of anxiety here is DNS propagation. The change is not always instant: sometimes it takes minutes, sometimes a few hours.
7. Environment variables and sensitive data
One of the most dangerous mistakes is putting API keys, passwords or tokens directly into files tracked by Git.
In a serious project, sensitive data is handled with environment variables — through a .env file locally, for instance, and dedicated settings on the provider's side.
The principle is simple:
- locally you use values that are never committed;
- online you enter the same values in the hosting service's panel;
- the code reads them without exposing them in the repository.
One caveat, though: if you are building a purely static front-end, some variables end up in the client bundle anyway and so are not really secret. That is worth understanding early.
8. Common problems after a deploy
When a site “works locally” but not online, the problem usually falls into a handful of recurring cases.
- Wrong asset paths: images, CSS or JS pointing at paths that change once online.
- Failed build: the provider cannot complete the build command.
- Missing environment variables: they were there locally, but not online.
- Unhandled SPA routing: refreshing an inner page returns a 404.
- Dependencies or Node versions that differ between local and hosting.
The useful skill to learn is not guessing. It is reading the build logs and isolating the exact point where the process breaks.
Very often a deployment does not fail “at random”: it is telling you something, you just have to learn to read that message calmly.
9. A checklist before going live
Before considering a deployment genuinely ready, it is worth running through a very practical checklist.
- the local build completes without errors;
- there are no sensitive files in the repository;
- favicon, title and basic meta tags are in place;
- links and navigation work on mobile and desktop;
- the 404 page and the main routes are handled correctly;
- the domain, if you have one, points to the right place;
- the HTTPS certificate is active;
- you have checked the real published version at least once, not just the preview.
10. Where to go from here
Once you understand basic deployment, the next step is not necessarily to complicate everything. Usually it is enough to make the workflow sturdier:
- preview deployments for testing before a merge;
- a clearer branch strategy;
- automated build checks;
- better handling of the domain, analytics and performance.
The important part is that from this point on the project no longer lives shut inside your computer. It enters the real world: it gets visited, tested, shared and improved with more purpose.
If you want to consolidate what you have learned, these guides fit together well:
- Git without panic: for the local side, commits, branches and recovering from mistakes.
- GitHub in practice: for repositories, push/pull and publishing your code.
- VS Code essentials: for builds, the terminal, debugging and a cleaner working routine.
- Technical SEO basics: for checking titles, sitemap, robots.txt, Search Console and the technical signals after a deploy.
- All tutorials: to follow the other content available.
11. Quick reference (cheat sheet)
Here is the practical checklist to follow before and during the upload of your site:
| Stage | What to check | Action required |
|---|---|---|
| 1. Compilation | Check that the local build compiles without errors. | Run 'npm run build' and read the terminal logs. |
| 2. dist/ folder | Check that index.html exists at the root of the output. | Static hosting servers look for index.html to serve the home page. |
| 3. DNS / Domain | Configure the DNS records correctly. | Add the CNAME or A records supplied by your host at your registrar. |
| 4. SSL / HTTPS | Check that the SSL certificate is active. | Every connection must be encrypted over a secure protocol. |
12. Practical challenge: put yourself to the test
Publish your code for the first time on a free hosting platform:
Generate the optimised production files and upload them manually, drag-and-drop, to Netlify or Vercel.
Step-by-step instructions:- Run the build command in your project's terminal:
npm run build. - Make sure the output folder
dist/(orbuild/) has appeared in the root directory. - Open your browser and go to Netlify (the *Netlify Drop* section) or Vercel.
- Drag the whole
dist/folder into the drop zone. Wait a moment, then visit the public URL it generates and check that it loads correctly over HTTPS.
13. Check what you have learned (quiz)
Test what you have learned in this guide with a quick 10-question multiple-choice quiz.