Setting up the ideal working environment
VS Code essentials: what you actually need to get started
You will spend more hours in your editor than in any other piece of software. And yet almost nobody studies it: people learn it by osmosis, one menu at a time, carrying slow habits and accidental settings around for years. This guide exists to skip that phase.
Visual Studio Code became the industry's de facto standard not because it is perfect, but because it struck a rare balance: the lightness of a text editor and the power of an IDE, measured out so that you only pay for what you use.
Using it well does not mean memorising every menu or installing dozens of extensions: it means turning it into a predictable tool — an environment where files turn up instantly, the terminal opens in the right place, and Git records your progress without ceremony.
The guide builds that setup one piece at a time: first we look at how the tool is made, then we configure it, and finally we put it to work on navigation, extensions and Git. At the end there is a practical challenge to consolidate what you have learned.
1. Why VS Code won
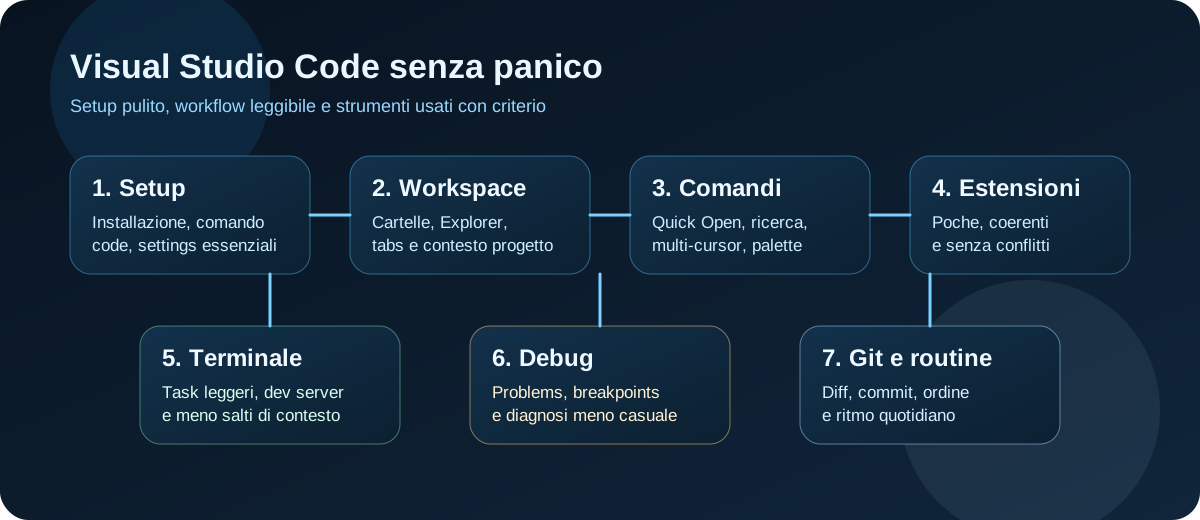
VS Code dominates web development for two reasons that reinforce each other: it starts fast and it grows only as much as you need. The native tools — search, terminal, debugger, Git — cover the whole life cycle of the code, and everything else is added by extension. Understanding how it manages that is not trivia: you will need it later, when you have to decide what to install and what to leave out.
Under the bonnet: three architectural choices
Released by Microsoft in 2015 as the open source project Code - OSS (from which alternative builds such as VSCodium also derive), the editor rests on three deliberate choices:
- Electron: it combines the Chromium rendering engine and the Node.js runtime. That is why the interface can be customised down to the last pixel (it is made of HTML, CSS and JavaScript) while still having direct access to the file system and to system processes.
- Monaco Editor: the text-editing engine, tuned to open enormous files and colour the syntax in real time without hesitating. It is the same component you find in GitHub's embedded editors and in many web services.
- Extension Host: the most important choice. Every extension runs in a process separate from the interface: if an extension hangs or grinds through heavy computation, the editor stays responsive. It is that isolation that makes a vast marketplace possible without every install being a bet on stability.
Advanced editor or full IDE? Getting this right saves you a lot of trouble
VS Code is often described as an “IDE” (Integrated Development Environment), but the reality is different. Understanding this distinction will help you use it properly, without overloading it.
Think of the difference between a fully-equipped camper van and a customisable racing motorbike:
- An IDE (the camper van): tools like WebStorm or Visual Studio Professional come “with everything inside”. The debugger, the linters, database management and compilers are all there already. They are ready to use, but heavy: they consume a lot of memory and impose a predefined workflow.
- VS Code (the racing motorbike): it starts as a blank sheet, light and very fast. Out of the box it does one thing: let you write code fluently. You decide, through extensions and settings, what to add to your desk.
Why does this detail change how you work?
Because in VS Code you are the architect of your own environment. Install dozens of extensions with no discipline and the editor becomes slow and chaotic. Learn to configure it with a few targeted extensions and settings specific to each project (as we will see in the coming chapters) and you get a responsive tool, tailored to what you actually do.
2. Download, install and first launch
Where to download VS Code safely
The official and only recommended starting point is Microsoft's site: code.visualstudio.com.
Avoid third-party portals and unofficial installers entirely. On the download page you will find packages for the three main operating systems:
- Windows: both a “User” installer (recommended — it installs into your user folder and needs no administrator privileges) and a “System” package (for machine-wide installations).
- macOS: you download a ZIP containing the application itself. Drag the Visual Studio Code icon into your Mac's Applications folder and the install is done.
- Linux:
.debpackages (for Debian/Ubuntu) and.rpmpackages (for RedHat/Fedora/CentOS) are available, plus flatpak and snap builds.
The first launch and the Welcome screen
When you open VS Code for the first time you are greeted by a welcome page that walks you through the first steps. The first choice the editor offers concerns appearance: the colour theme.
What to do straight away:
- Choose a readable theme: you can pick a dark theme (*Dark Modern*, for instance) or a light one. A dark theme tires your eyes less during long sessions.
- Close the welcome page: untick “Show welcome page on startup” at the bottom so it stops reappearing. VS Code will then open on a clean, empty window, ready to work.
3. Opening a project and setting preferences
Opening projects: graphical menu or terminal?
There are two ways to open a project in VS Code. Pick whichever suits how you work:
- The graphical route (classic): open VS Code from its system icon, click File -> Open Folder and pick your project's folder by browsing your computer. This works perfectly well, it is intuitive and it needs no terminal.
- The terminal route (optimised): type
code .in the terminal to launch the editor directly on the folder you are currently in.
What exactly does the code . command mean?
If you go the terminal route, the command has two parts separated by a space:
code: the command that invokes the Visual Studio Code executable..(the dot): in operating systems (macOS, Windows and Linux alike) this stands for the current folder — the folder your terminal is sitting in at that moment.
In short, typing code . tells the computer: “Open VS Code with the exact folder I am currently in as the active workspace”.
When and why does this become so useful? (Practical examples)
If you have never used the terminal, this command can look like a pointless complication. But it becomes essential in two situations typical of a developer's workflow:
- Scenario 1: when you download a project from the internet (git clone)
Imagine you want to work on an existing open source project. You open your terminal and typegit clone https://github.com/example/project.gitto download it. Then you typecd projectto move into the folder you just downloaded.
At that point you are already there in the terminal. Instead of taking your hands off the keyboard, grabbing the mouse, finding the VS Code icon, opening it, clicking File, choosing Open, browsing the folders to find the project you downloaded and clicking OK… you simply typecode .and the editor opens instantly on the right folder. You save time and avoid distraction. - Scenario 2: when you work on projects with nested folders (monorepos or subfolders)
Many modern projects have a subfolder structure (a top-level folder containing a/frontendfolder and a/backendone, say). Open them through the graphical interface and you might get confused and open the giant parent folder, slowing the editor down. Use the terminal to move exactly into/frontend(withcd frontend) and typecode ., and you open only the slice of code you need to work on, with no chance of getting the directory wrong.
Note: if for now you would rather not use the terminal, you can happily skip enabling this command. You can always set it up later, if and when you feel it genuinely helps your daily workflow.
How to enable the command on your system (optional):
- macOS: open VS Code as usual. Press
Cmd + Shift + Pto open the Command Palette, typeShell Commandand chooseShell Command: Install 'code' command in PATH. Now close and reopen your system terminal for the change to take effect. - Windows / Linux: the command is configured automatically while VS Code installs. Just make sure you did not untick “Add to PATH” during the installer's steps.
User settings and workspace settings: who decides what?
In VS Code you can customise any detail of the interface or the behaviour: from text size to background colour, right through to strict rules about how code must be formatted. All of this happens through settings.
To keep things from getting muddled, VS Code lets you apply preferences at two distinct logical levels:
- 1. User settings (global):
These are your personal preferences, tied to your account on the computer. They apply to any file or folder you open in VS Code. This is where your visual comfort and personal habits belong.
Typical examples: a dark or light theme, the font size (16px, say), the font family, or whether to show the minimap. - 2. Workspace settings (local):
These apply only to the current project folder. They are read from a file calledsettings.jsoninside a special folder called.vscodeat the root of your project. It is not created for you: it exists only if you (or your team) decide to create it and put project-specific rules in it.
Typical examples: mandatory 2-space indentation, formatting on save, or specific linter configuration.
Why does this distinction matter so much?
Imagine collaborating with a colleague on the same website. You prefer very large text (font size 18px) and a dark blue theme, while your colleague has an enormous monitor and prefers small characters (font size 12px) and a light grey theme. Those are personal preferences and belong in your respective user settings, so each of you works comfortably.
The site's code, however, must be written to exactly the same rules for both of you (always indented with 2 spaces and formatted automatically by Prettier on save, for example). Otherwise, every time one of you commits, they will unintentionally reformat the other's work, creating unmanageable conflicts in Git. Those code formatting rules therefore belong in the project's workspace settings.
If they conflict, who wins?
VS Code always applies a proximity rule: the project's local settings (workspace settings) always take precedence over your global ones (user settings).
If your personal user settings specify 4-space indentation but you open a project where the team set 2 spaces in the workspace settings, VS Code automatically uses 2 spaces inside that project and goes back to 4 when you open a loose file or another personal project. That guarantees the code's rules are always respected without forcing you to change your own preferences every time.
.vscode/ folder to your Git repository. That way anyone who clones your project inherits the same code-writing rules the first time they open it.Where this file lives and how to create it (if it isn't there)
Since the project settings file (workspace settings) is not generated automatically at the start, it is perfectly normal not to find any .vscode folder when you create or clone a new project. There are two ways to create it:
- Method 1: through the graphical interface (automatic)
Open VS Code's settings UI (pressCtrl + ,, orCmd + ,on Mac) and you will notice two tabs at the top: User and Workspace. Click the Workspace tab and change any setting (the font size, for instance). At that instant VS Code automatically creates the.vscodefolder inside your project and asettings.jsoncontaining your change. - Method 2: creating it by hand (recommended for developers)
You can create the folder and the file straight from your editor in a few seconds:- Right-click an empty spot in VS Code's side Explorer (the project's file bar) and choose New Folder. Call it exactly
.vscode(with the leading dot). - Right-click the
.vscodefolder you just made, choose New File and name itsettings.json. - Copy the block of code in the next section and paste it into the file.
- Right-click an empty spot in VS Code's side Explorer (the project's file bar) and choose New Folder. Call it exactly
.vscode) are treated as hidden system folders. Do not worry if you cannot see them in your computer's normal file manager: VS Code always shows them in its own Explorer.And where are the global settings (user settings)?
If you want to view or edit the global settings file as text (JSON), do not go looking in your project's folders. You can open it straight from VS Code:
- Open the Command Palette (press
Ctrl + Shift + P, orCmd + Shift + Pon Mac). - Type
Preferences: Open User Settings (JSON)and press Enter. - VS Code opens the global JSON file stored in your computer's system folders (for example
~/.config/Code/User/settings.jsonon Linux, or%APPDATA%\Code\User\settings.jsonon Windows).
A ready-to-use `.vscode/settings.json`
This is a proven starting point for a web project. Copy it into the settings.json inside the .vscode folder you just created:
{
  // Editor settings
  "editor.tabSize": 2,
  "editor.insertSpaces": true,
  "editor.detectIndentation": false,

  // Format automatically on save
  "editor.formatOnSave": true,
  "editor.defaultFormatter": "esbenp.prettier-vscode",

  // Apply linting fixes automatically on save
  "editor.codeActionsOnSave": {
    "source.fixAll.eslint": "explicit"
  },

  // A clean, productive interface
  "editor.minimap.enabled": false,
  "editor.stickyScroll.enabled": true,
  "editor.wordWrap": "on",

  // Keep noise out of global search
  "files.exclude": {
    "**/.git": true,
    "**/.DS_Store": true,
    "**/node_modules": true,
    "**/dist": true
  }
}
What exactly do these settings do? (A detailed walkthrough)
Copying this file into your project is convenient, but understanding what each key means will save you a lot of headaches. Here is how the main rules work:
"editor.tabSize": 2and"editor.insertSpaces": true:
They set the indentation width to 2 and avoid using literal tab characters. Pressing Tab therefore inserts two real space characters. That keeps the formatting tidy and identical on whatever computer the code is viewed."editor.detectIndentation": false:
By default VS Code tries to “guess” indentation by reading the last file you opened. That automatic behaviour is risky: paste in code copied from the internet using a different format and VS Code may suddenly change the rules for the whole project. Setting this tofalseforces the editor to always respect the 2-space rule you decided on."editor.formatOnSave": true:
Turns on automatic formatting. Every time you save a file (withCtrl + SorCmd + S), the editor tidies the code itself, fixing stray whitespace and crooked lines."editor.defaultFormatter": "esbenp.prettier-vscode":
Declares that the tool responsible for formatting is Prettier (one of the most widespread and effective extensions, which we will come back to in later chapters)."editor.codeActionsOnSave":
Tells VS Code to run corrective actions automatically on save. Here it picks up the linter's rules (ESLint) and applies minor syntax fixes on its own, so you do not have to."editor.stickyScroll.enabled": true:
One of the most useful visual features: it pins the lines defining the class or HTML tag you are currently inside to the top as you scroll down. In a very long file it tells you instantly which section you are in, without scrolling back up to check."editor.minimap.enabled": false:
Disables the miniature code map on the right of the screen. In modern web development that map is often superfluous and only steals space from the text."files.exclude":
Hides from VS Code's sidebar (Explorer) the service folders you should never edit by hand (node_modules, build output such asdist, or system files like.gitand.DS_Store). That lets you focus on your own source files and keeps the screen clean.
4. The workspace: a project, not a file
Working with folders (not with single files)
When you use VS Code you should never open a single isolated file (as you would with Notepad). The golden rule is to always open your project's whole folder.
Why does this make such an enormous difference?
- Open just one file and VS Code has no idea where it sits on your computer. It cannot help you find the site's other pages, does not know which formatting rules to use and does not detect errors in the other files. It becomes nothing more than a colourful text viewer.
- Open the project folder and VS Code switches on at full power: it indexes every file so you can search for a word across the whole project in a thousandth of a second, activates automatic error checking and connects to Git to show you which files you changed.
Recommending the right extensions: the `extensions.json` file
When you work with other people (or when you reopen one of your own old projects after months), it matters that everyone uses the same VS Code extensions — Prettier, for instance, to keep the code tidy.
Instead of writing a list of extensions in a plain text document and hoping the others install them by hand, you can create a special file inside the .vscode folder called extensions.json.
Put this simple text inside it:
{
  "recommendations": [
    "esbenp.prettier-vscode",
    "dbaeumer.vscode-eslint",
    "usernamehw.errorlens"
  ]
}
From then on, when another developer opens the project folder, VS Code reads this file and shows them a small notice in the bottom right: “This project recommends some extensions. Do you want to install them?”. One click installs everything needed, with no time wasted.
Workspaces: working on several folders at once
Sometimes a project is split across separate folders. You might have a folder called /website for the public side and one called /database for the backend data.
Opening the giant parent folder containing both risks cluttering the screen with files you do not need. To solve this, VS Code lets you save a custom workspace that groups only the folders you actually want to work on, showing them side by side in the sidebar.
This is done with a small text file with the .code-workspace extension, structured like this:
{
  "folders": [
    {
      "name": "Frontend website",
      "path": "./website"
    },
    {
      "name": "Backend database",
      "path": "./database"
    }
  ],
  "settings": {
    "editor.tabSize": 2
  }
}
To launch your workspace, just double-click the .code-workspace file. If for now you work alone on simple single-folder projects you will not need it, but it is worth knowing the option exists for when your projects grow more complex.
5. Moving at the speed of thought
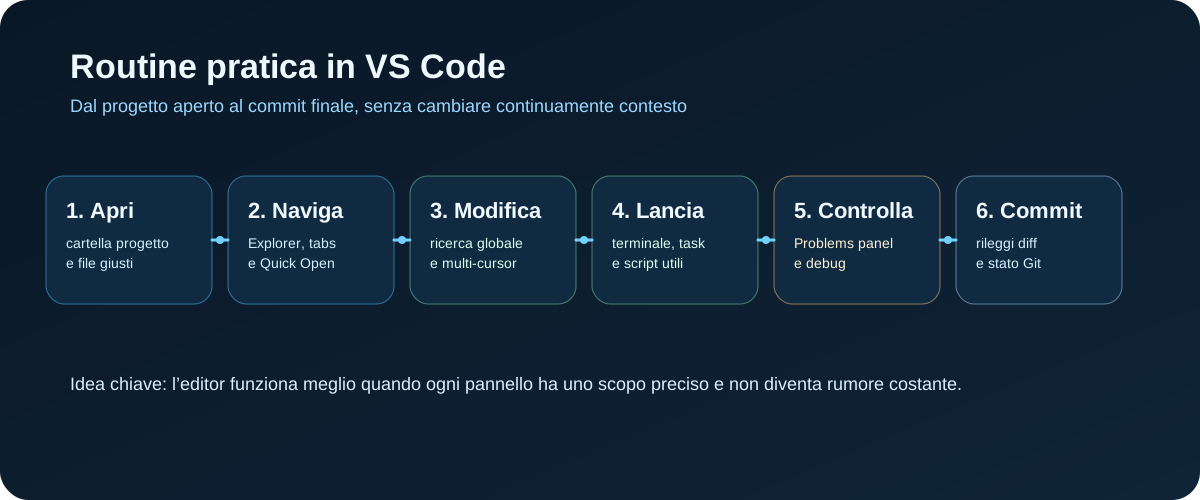
The Command Palette and the Quick Open bar: two tools in one
Moving at professional speed in VS Code means one thing: use the mouse as little as possible and keep your hands on the keyboard. To that end VS Code offers two tools that look separate but in fact share exactly the same search bar at the top of the screen:
- 1. Quick Open (
Ctrl + P, orCmd + Pon Mac):
Think of it as a search engine for your project's files. You open it, type the first few letters of a file (no need for the full name or the path) and press Enter to open it. No more scrolling through the Explorer on the left. - 2. Command Palette (
Ctrl + Shift + P, orCmd + Shift + Pon Mac):
Think of it as a search engine for VS Code's own functions. Instead of hunting through the editor's menus for an action (changing the theme, formatting the page, hiding the sidebar), you find it by typing its name. It is in fact the same bar as Quick Open, but with the greater-than sign (>) inserted automatically at the start.
Using the search prefixes in the bar
Press Ctrl + P (or Cmd + P) and VS Code shows the project's file list. Insert one of these special symbols before you start typing and the bar switches search mode.
The prefixes tied to a single file (@, @: and :) work like a microscope looking only inside the file currently open and active on screen. You cannot use them cold to search inside a closed file: you first have to find and open it, then use the prefix to zoom in.
@(index of the current file): lists every section, HTML tag or JavaScript function only in the file you currently have open. Extremely handy for jumping straight to a specific point. (Example: type@followed by the function's name.)@:(symbols grouped by category): a variant of@that groups the file's symbols by category (separating variables from functions or classes), which makes searching very large files tidier still.:(go to a line in the current file): type:150, for instance, to jump the cursor straight to line 150 of the open file. It is the quickest way to find the exact line an error points at.#(search symbols across the whole project): finds functions, variables or classes in every file in the project, including the closed ones.>(switch to commands — the Command Palette): turns the file search bar into a command search engine. It lets you run editor actions (>Toggle Minimap, say) without touching the mouse.edt(search among open tabs): with theedtprefix (note the space), the search is limited to the editors currently open, ignoring the rest of the project.ext(extension management): typeextfollowed by a tool's name to search for and install extensions from the marketplace right from this bar.task(run automations): typetaskfollowed by a space to pick and run one of the automation tasks defined in your project (starting the local server, for instance).debug(start debug sessions): typedebugto pick and launch one of the saved debug configurations for analysing how your code behaves.?(quick help): type a question mark in the bar and VS Code shows an up-to-date summary of all the available search symbols.
Parallel edits: when and how to use multiple cursors
Multiple cursors let you type in several places at once, sparing you the tedium of editing line by line. There are three ways to activate them, each suited to a specific situation:
- Method 1: editing the same word in several places (
Ctrl + DorCmd + D)
Select a word (a variable, or an HTML class name) and press the shortcut. Each press makes VS Code highlight the next identical word and add an active cursor there. It lets you rename a word in 5 places in 3 seconds. If you select one by mistake, pressCtrl + U(orCmd + U) to undo the last selection. - Method 2: typing in arbitrary scattered spots (
Alt + ClickorOption + Click)
Hold Alt and click wherever you want to type. Ideal for parallel edits across different lines where the words are not identical. - Method 3: vertical column selection (
Shift + Alt + DragorShift + Option + Drag)
Hold the keys and drag the mouse vertically. It creates one perfectly aligned cursor per line. Extremely useful when you have to insert or change the same code at the start of a run of lines (adding tags to a list of elements, for instance).
The 5 shortcuts to learn first, so you can drop the mouse
You do not need to memorise hundreds of keyboard shortcuts. Learn these five and you will speed up 90% of your daily actions:
| Action | Windows/Linux | macOS |
|---|---|---|
| Show/hide the sidebar (frees up screen space) | Ctrl + B | Cmd + B |
| Move the current line up or down in the file | Alt + Up/Down arrow | Option + Up/Down arrow |
| Duplicate the current line above or below | Shift + Alt + Up/Down arrow | Shift + Option + Up/Down arrow |
| Comment / uncomment a line or block of code | Ctrl + / | Cmd + / |
| Jump straight to where a function or class is defined | F12 (or Ctrl + Click) | F12 (or Cmd + Click) |
- Fully customisable: in VS Code every single key combination can be changed. If one feels awkward, change it under File → Preferences → Keyboard Shortcuts (or press
Ctrl + K Ctrl + S). - Clean installs: the keys listed above are the defaults on a fresh install of the editor. If you have installed particular extensions or keymap packages from other editors, these combinations may differ. They also depend on your keyboard layout: on some non-US layouts the comment and terminal keys sit elsewhere.
6. Extensions: the choice is yours
The accumulation trap
The Marketplace hosts tens of thousands of extensions. Installing them is trivially easy, but the real risk is accumulation: every extension adds processes, consumes memory and can slow VS Code down. Remember the golden rule: VS Code starts light, and keeping it that way is up to you. Plenty of developers prefer to work with no extensions installed at all and get on perfectly well. There is no obligation: install an extension only when you feel a real need to solve a concrete problem.
Extensions depend on the project
What to install depends entirely on the kind of project you are working on and on your own preferences. For instance:
- If you work a lot on visual design or on specific languages, you might want an extension that highlights the syntax or the colours.
- If you work in a team, a shared formatter (Prettier or Biome) or a linter (ESLint) can help align your writing style with your colleagues'.
The best rule is not to get ahead of yourself: start writing code with a clean editor. As you work on real projects you will work out for yourself whether, and which, extensions actually speed up your days.
What about artificial intelligence (AI)?
Integrating AI assistants directly into the editor (Codex, Claude or other models) is an extremely broad topic and, above all, one that is evolving very fast. The features and plugins change so quickly that any static list or configuration would risk being out of date within weeks.
For a structured overview — how to use these assistants as support without being replaced, and without losing your own analytical skills as a developer — see the tutorial: Developing with AI without losing control.
7. The integrated terminal
The command line within reach
The integrated terminal (which you can open and close quickly with Ctrl + ` on layouts that have a dedicated backtick key — on other layouts the key differs, and you can always rebind it) is one of the main reasons for VS Code's success. Because it starts automatically in your project's root folder (the workspace), it removes the tedium of navigating folders on the command line just to run your scripts.
For an optimised workflow, make use of these native features:
- Split terminal: click the two-column icon (or press
Ctrl + Shift + 5/Cmd + \) to split the pane and have two terminals side by side (one for the local server and one for Git commands, say). - Custom icons and colours: when several terminals are open you will see the list of tabs on the right of the terminal panel. Right-click one of them (for example
1: node) and choose Change Color… or Change Icon… so you can tell them apart at a glance (green for the local server, red for the tests). If you only have one terminal open, right-click its name in the top right of the panel header to reach the same options.
8. Git inside VS Code
Git's visual integration
VS Code integrates Git natively and visually inside the Source Control panel (which you can open quickly with Ctrl + Shift + G, or Cmd + Shift + G on Mac).
This integration is very useful for beginners because it lets you:
- See the exact list of every file you have modified, created or deleted in the project.
- Click a modified file to compare the differences (the “diff”) between the previous version and the new one, line by line.
- Stage files and write your commit message straight from the editor's text box, with no terminal commands.
Where to continue your learning path
To integrate the editor with the rest of the development flow, see these tutorials:
- Developing with AI without losing control: to master AI assistants (Codex, Claude and others) as operational copilots.
- Git without panic: to properly understand branches, commits and conflicts.
- GitHub in practice: to learn to collaborate in a team using remote repositories, forks and pull requests.
9. Quick reference (cheat sheet)
Here is a quick recap of the essential keyboard shortcuts for boosting your daily productivity:
| Action | Windows/Linux | macOS |
|---|---|---|
| Open the Command Palette | Ctrl + Shift + P (or F1) | Cmd + Shift + P (or F1) |
| Quick Open a file (search the project) | Ctrl + P | Cmd + P |
| Search symbols/functions in the open file | Ctrl + P -> type @ | Cmd + P -> type @ |
| Go to a specific line in the file | Ctrl + P -> type :number | Cmd + P -> type :number |
| Select the next occurrence (multi-cursor) | Ctrl + D | Cmd + D |
| Show/hide the sidebar | Ctrl + B | Cmd + B |
| Open/close the integrated terminal | Ctrl + ` | Ctrl + ` |
| Comment / uncomment a line or block | Ctrl + / | Cmd + / |
| Move the current line up or down | Alt + Up/Down arrow | Option + Up/Down arrow |
| Duplicate the current line above or below | Shift + Alt + Up/Down arrow | Shift + Option + Up/Down arrow |
| Format the whole active document | Shift + Alt + F | Shift + Option + F |
| Close every open tab | Ctrl + K W | Cmd + K W |
10. Practical challenge
Put what you have learned to the test by setting up an organised, professional working environment from scratch:
Create your workspace's local configuration files (.vscode) to turn on auto-formatting and share the recommended extensions, while practising fast keyboard navigation.
Step-by-step instructions:- Open a project folder: create a new empty folder on your computer. In VS Code, choose File -> Open Folder and select it. You now have an active workspace.
- Create the local settings: create a folder called
.vscodeat the root of your workspace. Inside it, create a file calledsettings.jsonand paste in this basic configuration to align the editor:{ "editor.formatOnSave": true, "editor.stickyScroll.enabled": true, "editor.tabSize": 2 } - Create the recommended extensions: in the same
.vscodefolder, create a file calledextensions.jsonand list the official formatting extension (Prettier), so that anyone collaborating with you is prompted to install it:{ "recommendations": [ "esbenp.prettier-vscode" ] } - Test the auto-formatting: create a file called
index.htmlat the project root. Write some badly aligned code (tags indented wrongly, lines all over the place). Save it (Ctrl + SorCmd + S) and watch the editor realign and tidy the code by itself, thanks toformatOnSave. - Navigate without the mouse: close every open tab with
Ctrl + K W(orCmd + K W). Now pressCtrl + P(orCmd + P), typeset, selectsettings.jsonwith the arrow keys and press Enter. You reopened the file in a second without touching the mouse.
11. Check what you have learned (quiz)
Test what you have learned in this guide with a quick 10-question multiple-choice quiz.