A practical guide for people starting from scratch
Before we start
This guide exists for one simple reason: to help someone starting from scratch understand GitHub clearly, without getting lost in jargon and muddled explanations.
It is not a complete manual on everything GitHub can do, and it does not pretend to be.
It is a practical guide, written for anyone who wants to grasp the genuinely useful basics, start using GitHub with a bit of confidence, and build a small workflow that is simple but sensible.
If you later want to go deeper into more advanced topics, you can turn to the official documentation, full courses and more technical tools. But to start well, in most cases, you do not need to know everything. You need to understand the right things.
1. What GitHub is
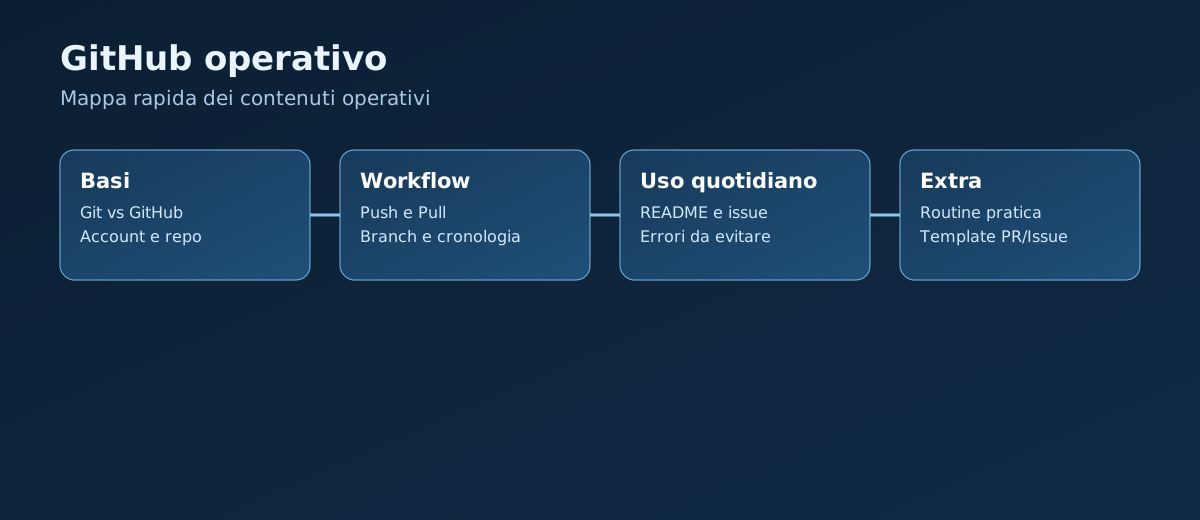
GitHub is an online platform that works alongside Git.
The first distinction to nail down is this: Git and GitHub are not the same thing.
If you would rather shore up the local Git fundamentals first, the Git without panic guide is a good place to go.
Git is the version-control tool that works on your project's files. GitHub is an online service that lets you publish, store, share and manage those projects on the network.
In short:
- Git is the tool.
- GitHub is the place online where you can put Git projects.
In practice: Git manages the project's history, GitHub hosts it online and makes collaboration easier.
People use GitHub for all sorts of reasons:
- keeping an online copy of their projects
- showing their work
- collaborating with other people
- organising code, documentation and files
- building a kind of technical portfolio
GitHub is useful on your own too, with no team and no huge projects. Even a simple project can benefit from it.
2. Git and GitHub: the difference, clearly, once and for all
Plenty of people start out saying “I'm using GitHub” when they are actually using Git in the terminal. Or they think GitHub is required in order to use Git. It is not.
You can use Git without GitHub. You can have a local project on your computer, make commits, browse the history and work away quite happily without ever publishing it online.
GitHub comes in when you want to:
- have an online backup
- sync the project across several computers
- share the repository
- publish your work
- collaborate
The simplest way to keep them straight is this: Git works first and foremost on your computer. GitHub works first and foremost online.
Git and GitHub compared
Git
Works on your computer. This is where you edit files, commit, switch branches and inspect the local history.
GitHub
Works online. This is where you publish the remote repository, see branches and commits on the web, open pull requests, read issues and collaborate.
Put even more plainly:
- if you are editing files, committing or running
git status, you are working with Git; - if you are looking at the repository in a browser, opening a PR or managing issues, you are working with GitHub.
GitHub is not only “code hosting”: it also adds practical tools you will use day to day, including:
- Issues
- Pull Requests
- Actions
- Wiki
- Projects
Getting this distinction straight early on saves you a lot of confusion in the steps that follow.
3. Why GitHub is useful even if you work alone
One of the most common mistakes is thinking GitHub is only for teams or for developers who already know what they are doing.
In reality GitHub is extremely useful when you work alone, especially while you are learning.
Why?
3.1 It gives you an online copy of the project
If your computer runs into trouble, having the repository online can save your work.
It is not automatic magic: it works well if you push regularly and do not leave everything sitting locally for days.
3.2 It helps you present yourself better
If one day you want to show your projects, GitHub is one of the first places many people look.
3.3 It gets you used to a real workflow
Even on small personal projects, using GitHub moves you towards a very common way of working.
3.4 It forces you to be a bit tidier
READMEs, repository names, commits, file structure: all things that push you to work more deliberately.
4. Creating a GitHub account
Opening a GitHub account is simple, but a few small choices are worth making carefully.
When you create the account, try to pick:
- a clean, credible username
- an email address you actually use
- a secure password
If the account will also be part of your online presence, the username matters. You do not have to be buttoned-up about it, but avoiding overly random names helps.
After signing up you can fill in a few details:
- profile picture
- short bio
- personal site link
- location
You do not have to complete everything straight away, but a minimal, tidy profile already makes a good impression.
Practical tip: turn on two-factor authentication (2FA) right away. It is one of the most important settings for protecting the account.
5. What a repository is
On GitHub, the main container for a project is called a repository, often shortened to repo.
A repository holds:
- the project's files
- folders
- the commit history
- any branches
- information about the project
- the README and other documents
Think of it as your project's home.
If you have a small project, an exercise, a guide or a simple application, each one can have its own repository.
When you create a repository you also choose its visibility: public or private.
Types of repository
Public repository
Anyone can see the contents. Useful for:
- portfolios
- demo projects
- code you want to share
- exercises you want to be visible
Private repository
Generally only you and the people you grant access can see it. In organisation repositories, permissions may also depend on teams, roles and internal settings.
Useful for:
- work in progress
- experiments that are still messy
- material that is not ready
- content you do not want to make public
Being public is not compulsory. Early on, a private but tidy project beats a public but sloppy one.
Practical tip: give every repository one clear purpose. Avoid generic containers with different projects mixed together: they make it harder to find your way, to collaborate and to maintain the work over time.
Security note: never commit secrets to the repository (tokens, passwords, .env files). Even in a private repo, treating them as sensitive data is a good habit.
6. A repository's main screen
When you open a repository on GitHub, you will find several important areas.
Elements of the repository screen
Repository name
The project's name. Try to keep it clear.
File tab
Here you see the folders and files in the project.
README
If there is one, it usually appears below the file list on the repository home page, and it is one of the first things people read.
Recent commits
These show you the latest recorded changes.
Branches
These tell you whether you are looking at the main branch or another branch of the project.
Insights, settings and other sections
Useful sections, but early on it is better to concentrate on the basics first.
Practical tip: when you open a repository, check the selected branch and the latest commit shown at the top straight away: it saves you making changes on the wrong branch.
7. Creating a repository on GitHub
You can create a repository directly on the GitHub site.
The typical steps are:
- click “New repository”
- choose a name
- add an optional description
- choose public or private
- decide whether to initialise it with a README
For a beginner, the repository name matters a lot, because it helps keep things tidy over time.
- if you have a single project, a simple, clear name is enough
- if you expect several projects, it pays to adopt a consistent convention from the start
Simple examples of a convention:
studio-landing-page,frontend-portfolio,bookings-api00-environment-setup,01-showcase-site,02-admin-dashboard
Numbering is not compulsory, but it can help if you are building a progressive path or a series of connected projects.
The practical rule is: pick a structure and keep it consistent across all your repositories.
- short, readable, unambiguous names
- no spaces — use hyphens (
-) - a repository description filled in with a useful sentence
- an initial README, almost always
If you are starting from scratch and want a simple project, initialising it with a README is often the best choice.
If instead you already have the project on your computer and want to connect it afterwards, you can create an empty repository and add the files from your machine.
8. Connecting a local project to GitHub
To connect a local project to GitHub, let's look at the two most useful cases.
Case A: you only use Git. Here the GitHub repository must already exist.
git init
git add .
git commit -m "First commit"
git branch -M main
git remote add origin https://github.com/USERNAME/REPO-NAME.git
git push -u origin main
Case B: you do everything from the terminal. If you would rather not open the GitHub site, use the GitHub CLI (gh) to create the remote repository.
gh auth login
gh repo create REPO-NAME --private --source=. --remote=origin --push
If you want a public repository, use --public instead of --private.
This command assumes the current folder is already a local Git repository, or that you want to initialise it through the CLI's guided flow. If you have not prepared the project locally yet, sort out the repository, the initial commit and the files to publish first.
Practical tip: think of it this way: git manages the local project, gh creates the repository on GitHub from the terminal.
The right mental sequence is:
- first the local project exists;
- then you connect it to a remote repository on GitHub;
- then you
pushto send the commits online.
9. Push and Pull: syncing local and remote
Push: sending your changes online
Push means sending your local commits to the remote repository.
Put as simply as possible: you have already saved your work locally with a commit, and push sends it to GitHub as well.
- you make changes on your computer
- you save them with a commit
- you push
- the changes land on GitHub
Many beginners think that saving a file or making a commit already updates GitHub. It does not.
A commit saves the work in the local history. A push sends those commits online too.
A typical example:
git add .
git commit -m "Update contact section"
git push
Practical tip: always run git status before pushing. It helps you avoid committing files you did not mean to.
Pull: bringing online changes down locally
Push's counterpart is pull.
With pull you bring down to your computer the changes that have arrived on GitHub in the meantime.
It is useful when:
- you work from two different computers
- you collaborate with someone
- you made changes online and want them back on your machine
The basic command:
git pullAnd here is the part that often catches beginners out: pull does not only mean “download”.
pull downloads and also tries to integrate those changes into the branch you are currently on.
In the most common configuration it is equivalent to fetch + merge. In some workflows it may use rebase. So it is not a harmless button to press at random.
Practical tip: if you work alone and want a more linear history, consider git pull --rebase instead of git pull.
The short version:
push= from your computer to GitHub;pull= from GitHub to your computer.
10. Pull Requests: the practical flow worth really understanding
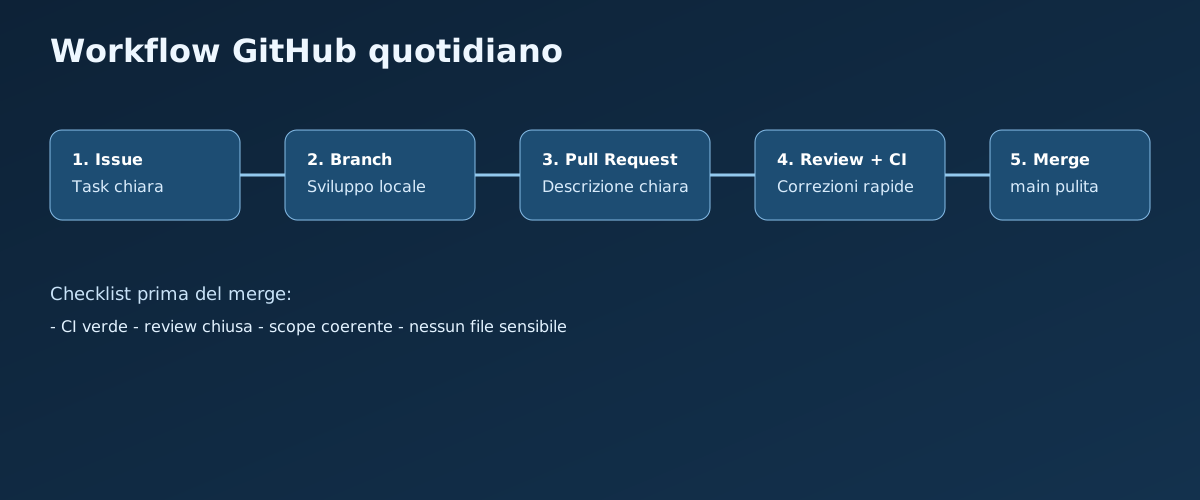
The pull request, often shortened to PR, is one of GitHub's central ideas.
In plain terms, a PR is a way of saying: I have finished this change on a branch, now I want to compare it with another branch and decide whether to merge it.
It is not only useful on large teams. It helps on your own too, because it forces you to separate work more clearly, reread the diff and do a minimum of quality control before merging everything into the main branch.
The most common basic flow
- you create a branch for a specific change
- you make local commits
- you push the branch to GitHub
- you open a pull request
- you review the differences, the comments and the state of the checks
- you merge when everything is in order
A simple example
git switch -c feature/faq-home
git add .
git commit -m "add FAQ section on the home page"
git push -u origin feature/faq-home
At that point, on GitHub, you can open a PR from feature/faq-home into main.
The practical thing to understand is this: a PR does not change the main branch's code by itself. A PR opens a comparison and a proposal to merge.
What to look at inside a PR
- a clear title
- a concise description of what changes
- the diff of the modified files
- any comments or reviews
- the state of the automated checks, if there are any
A PR is not just a button for merging. It is a moment for checking: whether the changes make sense, whether the branch is the right one, and whether you are really merging what you meant to merge.
A useful distinction
Branches and pull requests are not the same thing.
- the branch is the separate line of work
- the pull request is the proposal to merge that line into another branch
Put even more bluntly:
- the branch is where you work;
- the PR is where you check and propose the merge.
Practical tip: even working alone, opening a PR for medium or large changes helps you think more carefully before merging.
11. README and Markdown: the essentials
The README.md file is one of the most important parts of a repository.
Plenty of people ignore it at first, and that is a mistake. A good README makes the project clearer, more presentable and more useful to you as well.
Inside a README you can write:
- what the project is
- what it is for
- the technologies used
- how to run it
- the basic structure
- any important notes
A small project does not need a long README: clear, useful information is enough.
A minimal example might contain:
- the project title
- a short description
- the stack used
- quick instructions
- the project's status
READMEs are almost always written in Markdown, a simple format that lets you create headings, lists, links and code blocks.
# Main heading
## Subheading
**bold text**
- list item
- another item
Markdown stays readable while you write it and needs no complicated syntax.
Practical tip: always add a “Quick start” section with 2-3 commands. It is the part readers look for first.
12. Branches: what they are and when to use them
A branch is a line of the project.
The main branch is now usually called main.
To grasp the concept without jargon, think of it this way: a branch is a separate line of work.
- the main branch is the project's main version
- a secondary branch is a space where you can experiment or develop a change without touching the main version straight away
On tiny personal projects you may well work directly on main, especially at the start.
But as soon as the work grows a little, or you want to make riskier changes, it is worth moving to dedicated branches.
The practical benefit is this: you can work on a change without immediately messing up main.
They are useful, for instance, when you want to:
- rebuild a section of the site
- test a new feature
- try a refactor
- keep a demo separate from the base version
You do not need a branch to change a comma. But in certain cases they help a lot.
Practical examples:
- you want to rebuild the whole navbar
- you are working on a new page
- you want to prepare a demo version
- you want to make big changes without immediately messing up main
The idea is not to complicate your life, but to protect the main project while you work.
Practical tip: use descriptive branch names, for example feature/navbar-mobile, fix/form-validation, docs/readme-update.
13. Commits and history on GitHub
A commit is a tracked save of the project in Git's history.
While it stays local, you only see it on your computer. When you push, that commit reaches GitHub too and becomes visible in the repository's history.
The history matters because it tells you clearly:
- what changed
- when it changed
- under what message
- who made the change
Even working alone this is essential: after a few days you may no longer remember what you touched, or why.
The basic flow:
git add .
git commit -m "update contact section"
git push
The most important part is the commit message: it should explain in one line what you changed.
A simple rule: verb + what changed.
Vague messages to avoid:
- update
- fix
- test
- wip
Clear messages:
- add FAQ section
- update contact page layout
- remove components no longer used
- improve footer structure
If you put unrelated changes in one commit (navbar + form + README, say), the history becomes hard to read.
Practical tip: make small, coherent commits: one clear change per commit.
14. Editing and uploading files from the browser
GitHub also lets you edit small files straight from the browser.
This can be handy for:
- correcting a README
- adding a note
- fixing small wording details
You can also upload files through the web interface.
There are two practical limits worth knowing straight away, though:
- if the branch is protected, GitHub may stop you editing or uploading files there from the browser;
- web upload is not designed for large files or for structured development flows.
Editing and uploading from the browser is useful for quick fixes, but it should not become your main flow.
For a tidy workflow it is better to:
- work locally
- use Git
- commit
- push
For large or structural changes, working locally is better: from the browser it quickly gets awkward and confusing.
Practical tip: use the browser for quick micro-fixes, not for full development.
15. Clone and Fork: the difference and how to use them
Clone and fork look similar, but they do different jobs.
Clone and Fork compared
Clone
The clone command downloads an existing repository to your computer.
Example:
git clone REPOSITORY_URLUseful when:
- you want to work on a repository that is already on GitHub
- you are moving to another computer
- you want to download one of your own online projects
Clone creates a complete local copy of the repository.
Fork
A fork is a copy of a repository inside your own GitHub account.
In brief:
- clone = a copy on your computer
- fork = a copy in your GitHub account
That is the difference that really counts: clone works on the local plane, fork works on the online plane.
Forking is most useful when you want to start from an existing public project or contribute to a repository you do not control directly.
In many cases forking is part of the “fork -> clone -> branch -> commit -> push -> pull request” flow used when you have no direct write access to the original repository.
Practical tip: if the repository is yours, cloning is usually all you need. Use a fork when working on someone else's repository.
16. GitHub's extra features
Here we take a closer look at GitHub's main extra features, one by one.
GitHub's extra features
Issues
An issue is a work item: it describes something to do, a problem to solve or an improvement to make.
In practice it helps you not lose track of things and see what the project is still missing.
Pull Requests
A request to integrate: you propose changes made on a branch and ask for them to be merged into the main branch.
It exists for review, comparison and quality control before merging.
Actions
Automations run by GitHub: automated tests, builds, deployments and code checks.
Put simply: they are jobs GitHub runs on its own when something happens, such as a push or a pull request.
They help reduce manual errors and standardise the flow.
Wiki
A space for the repository's internal documentation.
Useful for guides, procedures and technical notes longer than the README.
Projects
An organisational board (Kanban style) for planning and tracking work.
It helps you see what is to do, what is in progress and what is done.
17. Conclusions
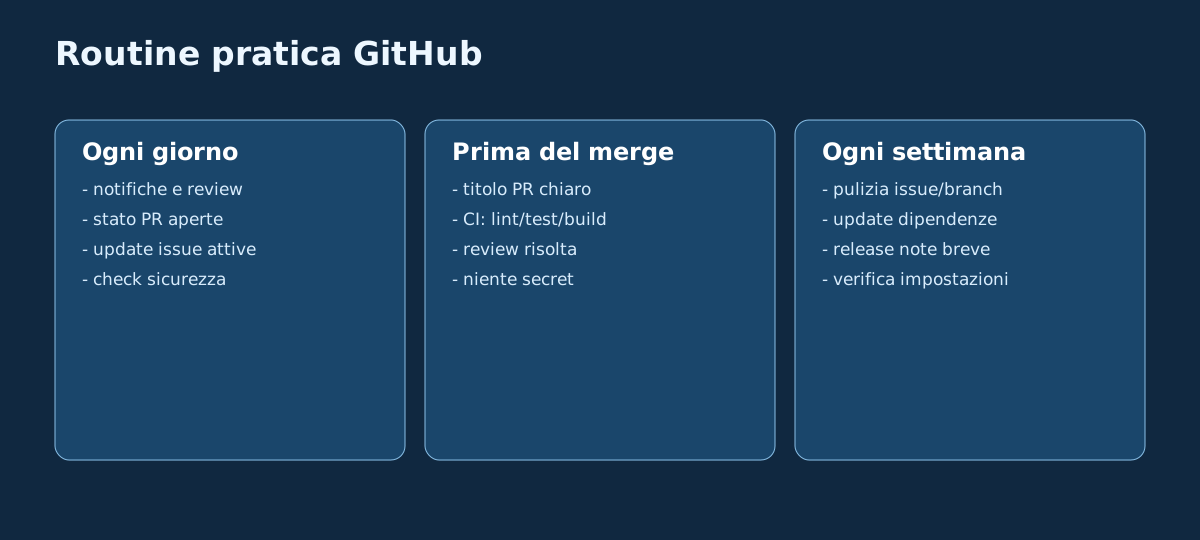
- Common mistakes to avoid: do not confuse Git with GitHub, do not work only from the browser, do not make vague commits, and do not treat pulls and PRs as automatic steps to perform without checking.
- A simple, healthy basic workflow: you refresh your context, work locally or on a branch, make clear commits, push, check on GitHub and use a PR when it helps.
- A complete practical example: edit files,
git add,git commit,git push, final check online. - What you do not need to know yet: advanced automation, complex permissions and sophisticated strategies can wait.
- GitHub and your own growth: it helps you work with more order, traceability and continuity.
Apply these points consistently and GitHub becomes a clear, dependable working tool.
Related guides
- Git without panic: local fundamentals, commits, branches, merges and recovering from mistakes.
- All tutorials: an up-to-date list of the available guides.
18. Quick reference (cheat sheet)
Here is a recap of the key commands for working with a remote on GitHub:
| Command | What it does | When to use it |
|---|---|---|
| git clone <url> | Creates a complete local copy of a repository hosted on GitHub. | At the start of a new project, working from a repo that already exists online. |
| git remote add origin | Connects your local repository to a remote server on GitHub. | After creating a new local repository and an empty repo online. |
| git push -u origin main | Sends local commits to the remote server and sets up branch tracking. | On the local branch's first push. After that, plain 'git push' is enough. |
| git pull | Downloads and integrates remote changes into the active local branch. | At the start of a working session, or to bring your machine back in line. |
19. Practical challenge: put yourself to the test
Get your code online by publishing a personal page on GitHub Pages:
Create a remote repository on GitHub, connect your local code, push it and publish your static page on the internet.
Step-by-step instructions:- Sign in to your GitHub account and create a new public repository called
showcase-site(leave it empty, with no README or .gitignore). - In your local project's terminal, run
git remote add origin https://github.com/YOUR-USERNAME/showcase-site.git. - Push your main branch with
git push -u origin main. - Go to *Settings -> Pages* in the repository on GitHub, choose the *Deploy from a branch* source and select the *main* branch, then check the site's public address after a few minutes.
20. Check what you have learned (quiz)
Test what you have learned in this guide with a quick 10-question multiple-choice quiz.